Astronaut
3D-Modelling
- Cinema4D
- University projects

Planning
The scene should take place in space with the shining earth in the background. As an environment for the astronaut, I was inspired by several pictures and decided on a metallic, futuristic tube. As a further detail, there should be two spaceships in the background.
Modelling
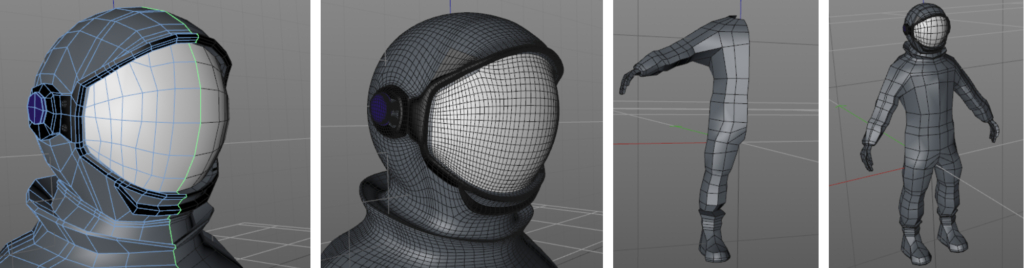
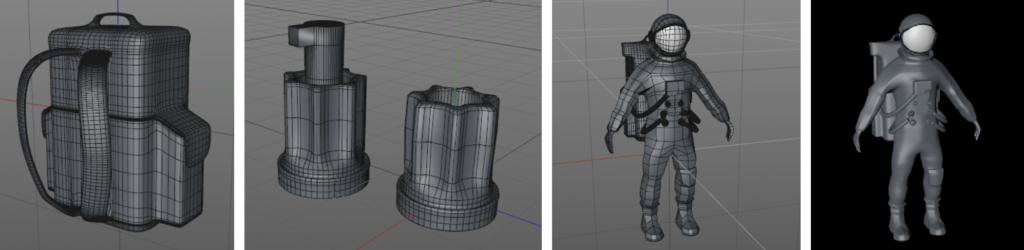
To make the astronaut more detailed, I modeled two types of nozzles with the Loft tool in an external project. One to which a hose can be connected and another one that should stand on its own. I also modeled small screws to decorate the helmet and to serve as buttons on my suit. Afterwards the nozzles and screws were placed on the spacesuit. Furthermore, I modeled the astronaut’s backpack from a cube and added it to the model of the astronaut. Lastly, I connected the backpack and the astronaut with hoses, which I created with a sweep tool.
When the model of the astronaut was ready, I concentrated on how to get him into the right position for my final scene. Additionally, I tried to find good, free to use textures, which turned out to be quite the challenge. Furthermore, I created some seams by using loop cuts to create narrow sections which I then extruded slightly. I also created small logos on the and a layer to create small logos on the suit.

For the background, I modelled a spaceship out of a cube according to my imagination. Two versions of the spaceship were created, both of which I included in my scene. In my final scene I had some problems with my silver texture, which can be seen in the image below, so I had to change the texture. The environment of my scene is mainly dominated by the big tube in which the astronaut is standing. the astronaut is standing. I created this by using the basic object „tube“, which I created after converting it into a polygon model by extruding and beveling it into the desired shape. In addition, I used a sweep to attach hoses to the walls of the tube and modelled two barrels. two barrels, which I also placed in the background.
